From a post before I wrote about how you can implement different languages into your language with the help of Angular’s i18n internationalization system. That means your application can be built and have multiple folders which are the translated version of the app. In this example I have Japanese and the default English from previous post. What we want to do here is take use of the translations we have already made. Before we could easily switch between the languages with the help of various configurations by using the serve command, however, what if we want to have the languages changable depending on what URL is being used? We will make it possible to have the English version if the user visit en in the URL, or ja in the URL for Japanese version. Note that English have no actual translations from a translation file because this is the default language To accomplish our goal we must deploy all the languages folders and have the language URL bound to each language version. Let’s go through what needs to be done to accomplish that.
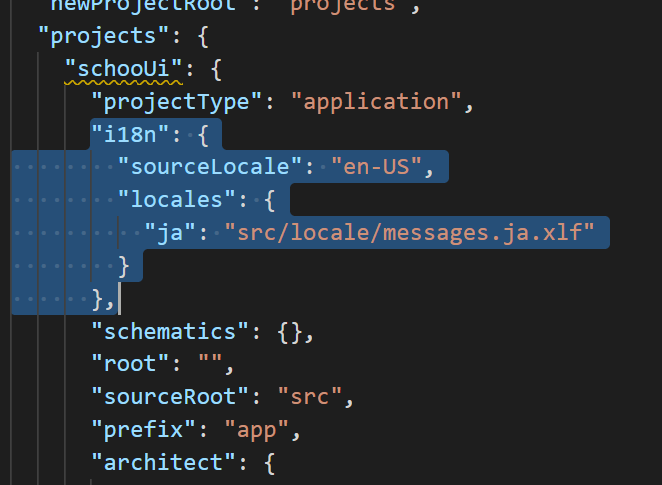
First we must make sure that sourceLocale is set to en-US and we have locales like this in our anguar.json file.
Then I will check so that we can still build and serve it by running ng server –configuration=”ja” which it does. Remember, from the previous post all of this has already been set up.
Great, we know we have Japanese language working. Let’s set up the possibility to deploy to Google Cloud, or well, to Firebase. For the usual Google Cloud deploys we would need to have a .yaml file, but in this case we need a firebase.json since this is Firebase we are working with. To get things ready we need to initialize Firebase.
Init firebase
Since I don’t have Firebase initialized already, I’ll do it by typing this.
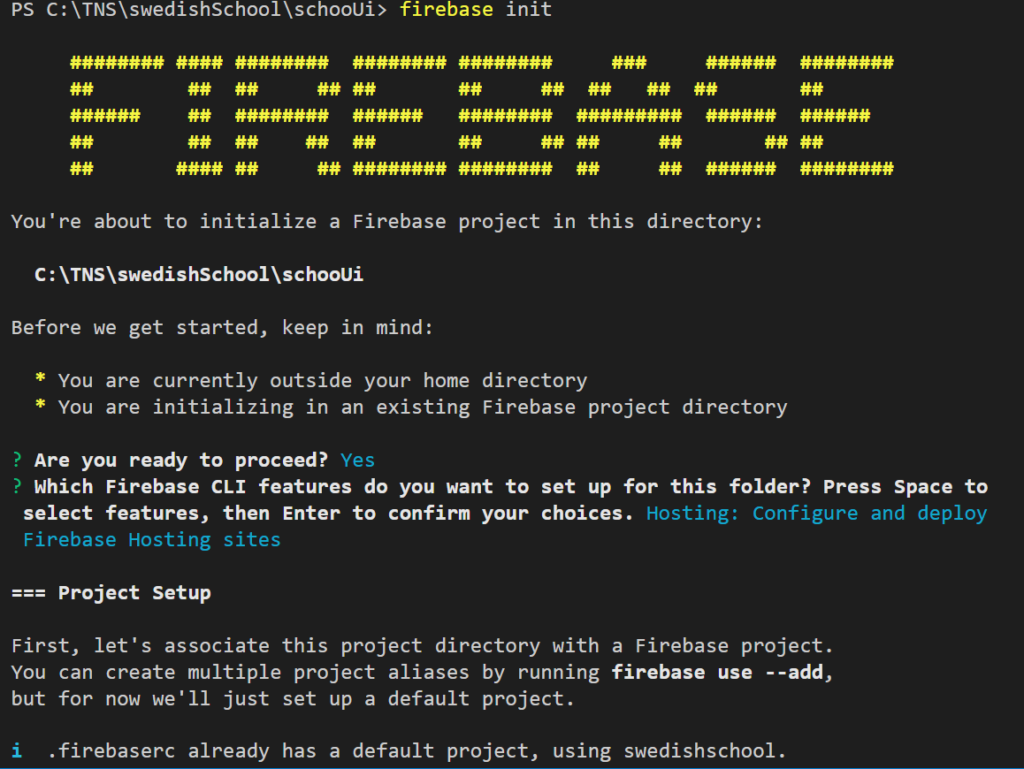
firebase init
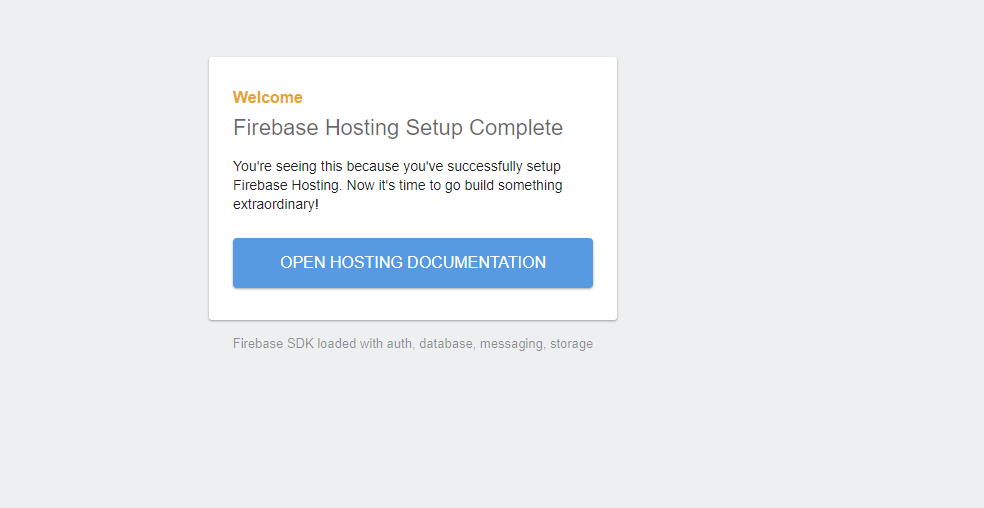
Notice I am in my root project folder when initializing Firebase, I choose hosting because that’s what I am interested in only for now and also rewrite URLs to index. I already had a default project so didn’t need to choose. If you don’t have an project yet simply create one at console firebase. Now we could try firebase deploy but then we would see this beautiful screen:
Anyways, it means it is working at least! We can open up firebase.json and see that it is deploying a newly created public folder which contains a index.html Firebase created. Let’s not go with that and deploy our own app! I am going to go ahead and say public is equals to our ja folder (my Japanese version folder) to see if the app will show the translations just to verify. If you’re wondering why schoolUi is appearing everywhere, it is just the name of my app I am using currently. So this is the current settings in the firebase.json.
Crazy how fast it is to deploy (specially with Firebase), let’s see what happen by opening up the URL we got printed out in the terminal if successfully deployed.
First I thought something was wrong since I only saw the index.html from before but with a web browser refresh I can now see my app in the Japanese version exactly what we wanted! Alright so next challenge is to deploy all folders and have a index.html file linking to each language URLs. Let’s modify our host property so we can use the app in more languages. If you want to go into more detail you can see information about this here.
I also happen to notice a thing that could be improved which is in the angular.json file, that en-US should be named en there instead since that’s what we want the URL to be too. So let’s build it again.
We should have a folder of en and ja. Great, now I edited the firebase.json file to look like this. A lot of things happening here but hopefully I’ll make myself clear.
Key is is that public folder is set to the folder which contains all of the languages, in my case it contains both en and ja and then we set i18n root to the same folder with the forward slash.
We deploy now
firebase deploy
We can now visit https://x.web.app/en/ for English and https://x.web.app/ja/ for Japanese. Default will be https://x.web.app/en/. And there we go, we got support for multiple languages in different URLs.
There was not too long ago a nice little blog article about how Angular have improved the localization system here so I thought I’d take a look on the Angular localization. In my application I am going to add Japanese as a second language on top of English. Note that I am using a existing project and not creating a new one. Angular also have a good tutorial on most of it here which I am using as a reference. If you need language codes and don’t wanna do Japanese like I am you can visit this page and find your language codes that you want to use. Japanese is pretty easy because it uses just “ja”, and not like “en-US” you have to do with English.
Alright let’s get started! First of all, let’s install the needed localize package into your Angular project. I do use Angular 10 here.
ng add @angular/localize
When that is done we are ready to proceed. Also, good to know is that default language is English as stated in the documentation: Angular by default uses en-US (English in the United States) as your app’s source locale.
We now need to prepare where and what texts in our application that we want to translate. You do this by the i18n attribute. For example, I have an h3 element here which my current text is “Main Menu”. I am going to make this use the translation package by adding i18n to it. like this.
<h3 i18n>Main Menu</h3>
We can specify meaning information about this element like this. I am adding Main menu here to the i18n attribute.
<h3 i18n="site menu">Main Menu</h3>
You can also go a step further to add description like this.
<h3 i18n="site menu|This menu is the main menu used for all main pages">Main Menu</h3>
That way, any text marked with site menu as the meaning will be translate the same way. Left side is meaning and the right side of the | is description. Now we also would like to use an custom ID which we will use in the translation file for later, so the element gets can ID by having two at signs like this @@ then the ID you declare, in my case my custom ID is SiteMainMenu:
<h3 i18n="site menu|This menu is the main menu used for all main pages@@SiteMainMenu">Main Menu</h3>
Another thing to keep in mind but which I am not going to translate now, is that if you want to translate an attribute, not just a simple string in an element, you must use the i18n then the attribute you are translating like this:
<img [src]="fileidea-logo" i18n-title title="Fileidea have great tutorials and information about so much things it's amazing" />
So above to translate the title, we use i18n-title.
Still unsure what meaning and description is for, it is all for the transaltor. See quote:
The translator may also need to know the meaning or intent of the text message within this particular app context, in order to translate it the same way as other text with the same meaning. Start the i18n attribute value with the meaning and separate it from the description with the | character: <meaning>|<description>.
For example, you can add the meaning that this <h1> tag is a site header that needs to be translated the same way not only when used as a header, but also when referred to from another section of text:
https://angular.io/guide/i18n#help-translator
Where do I write my translations?
Okay cool, we got it how to make our Angular html templates ready for some translations with the i18n attribute and are ready to write translations. And where you do that is by first creating such file with the command ng xi18n. This command will create a file that contains things we want to translate.
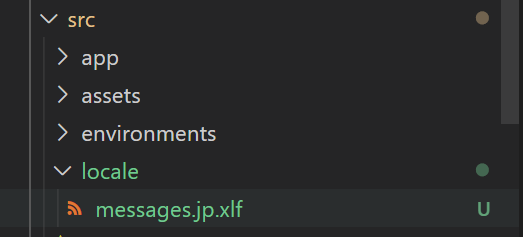
To set things up, we will run this command with output path in a locale folder, the filename as my desired name and set the format till the default xlf2. The name of the file should have an name that matches the language locale you are translating for. So something like this: messages.jp.xlf in my case. For french it would be messages.fr.xlf for example and so forth. So run the command:
The command creates a new file for our new language. Great, we are now ready to write translations! Using the trans-units we will declare pure texts of elements that we want to translate, our <h3> element for example! So let’s go ahead and implement this for our h3 Main Menu text.
First off, we must define what is going to be translated. Do first like this to say “this is what needs to be translated”:
            <trans-unit id="SiteMainMenu" datatype="plaintext">
                <source>Main Menu</source>
                <target>メインメニュー</target>
                <note priority="1" from="description">This menu is the main menu used for all main pages</note>
                <note priority="1" from="meaning">site menu</note>
            </trans-unit>
We set an ID here, along with source which is what we want to translate along with the description and meaning data to keep the translator informed. Then when it has been translated the whole document looks like this:
<?xml version="1.0" encoding="UTF-8" ?>
<xliff version="1.2"
    xmlns="urn:oasis:names:tc:xliff:document:1.2">
    <file source-language="en" datatype="plaintext" original="ng2.template">
        <body>
            <trans-unit id="SiteMainMenu" datatype="plaintext">
                <source>Main Menu</source>
                <target>メインメニュー</target>
                <note priority="1" from="description">This menu is the main menu used for all main pages</note>
                <note priority="1" from="meaning">site menu</note>
            </trans-unit>
        </body>
    </file>
</xliff>
What changed is that target has been added which contains the (Japanese) translation. Now there are tons of more information in the documentation about how to build your app into a different language etc, but I am interested on how we see our app in the Japanese language without too much hassle. So let’s fix some configurations so it can be used in Japanese!
Open up your angular.json file and add just above architect under your project name:
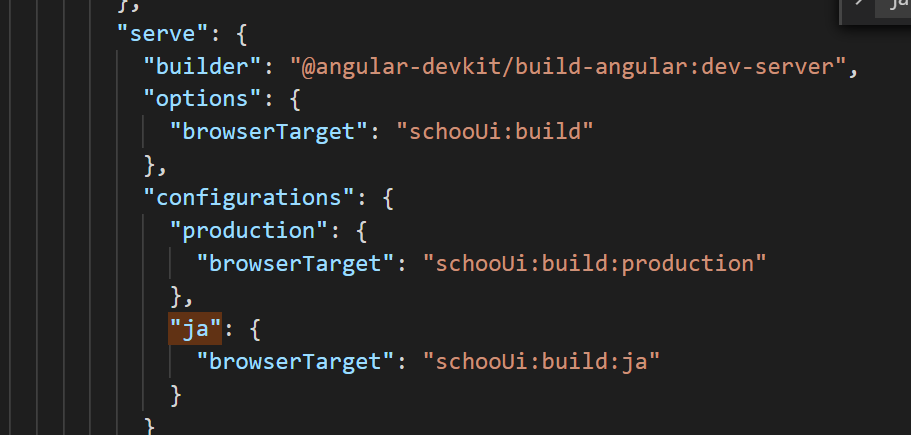
Okay now with the angular.json your app knows it got some more than the English locale that it can use. Then I am going to add this under configurations for “serve”.
"jp": {
    "browserTarget": "schooUi:build:jp"
}
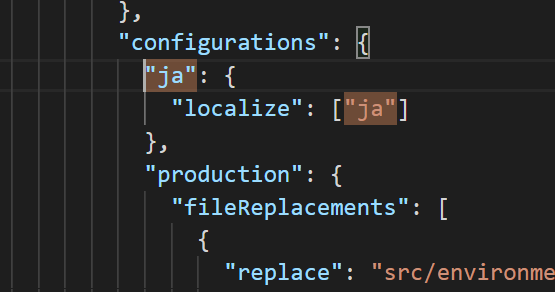
Then do the same for the build so we can choose to update the localization when we use ja for build too.
"ja": {
              "localize": ["ja"]
            },
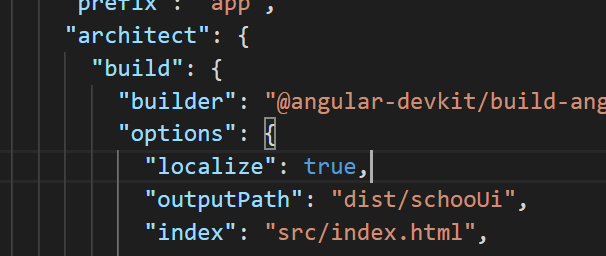
Now if you wanna build with localize all the time, simply type in: “localize”: true in your angular.json file under “options” -> “build” -> “architect” (under your project app name).
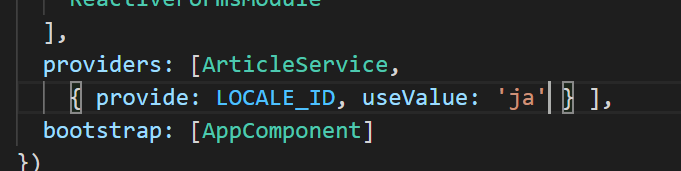
If you simply don’t like setting the configurations each time when serving or building you could “hard code” the LOCALE_ID into the providers under the app.module.ts file. However, I will not do this because I am using the jp configuration instead.
{ provide: LOCALE_ID, useValue: 'jp' } ]
NgModules providers looks like above.
Alright let’s try out the ng build with localize (because we have “localize”: true under build in angular.json)! Type:
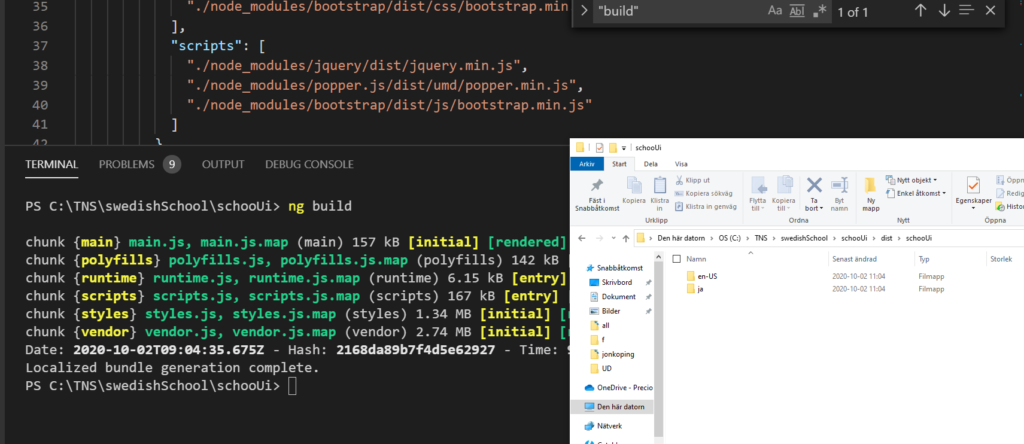
ng build
If you do not use localize true, then type: ng build –localize. That way we are building our app for all of our languages, and in my case, it will go through both English and Japanese. We can visit our dist folder to see it actually exists.
Two folders, one en-US and one ja after ng build
Problem I had on the way
You can skip this part but just for documentation, I had some strange problems on the way, one was the following.: Module parse failed: Unexpected token (1:0). You may need an appropriate loader to handle this file type, currently no loaders are configured to process this file.
I fixed it by updating the acorn package and deleting and installing all packages again:
npm install acorn@6.1
rm -r -Force node_modules
rm -Force package-lock.json
npm install
So basically just reinstalled everything.
Another error I got was: compilation error: Localized bundle generation failed: Cannot read property ‘value’ of undefined
This fixed itself by updating some Angular stuff
ng update @angular-devkit/build-angular
Then I ended up doing an ng update @angular/core as well because of the problems I was having. However, these things I did here is hopefully not relevant for you.
Running the application with translations
Time to try things out and to use the ja locale we defined in our angular.json file at the serve configurations section, we will type to run our app in japanese locale:
ng serve --configuration="ja"
By running configurations, we are now pretty much “pretending” to be Japanese and want the Japanese translations to appear for us because in a more real setting, we could have the locale be set by the location of the user and redirect the user to the right place.
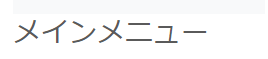
Result looks like this:
Works pretty good. Instead of our English text “Main Menu” we now have メインニュー.
Error – Development server only supports localizing a single locale per build
An issue you might encounter is where the app has too many languages and can’t decide which want to start with just ng serve without specifying which language.
You type: ng serve Error is: An unhandled exception occurred: The development server only supports localizing a single locale per build
This is probably related to what is being said in the quote below. After I removed localize: true it started working again with the normal ng serve.
Due to the deployment complexities of i18n and the need to minimize rebuild time, the development server only supports localizing a single locale at a time. Setting the "localize" option to true will cause an error when using ng serve if more than one locale is defined. Setting the option to a specific locale, such as "localize": ["fr"], can work if you want to develop against a specific locale (such as fr).
This error was kind of weird honestly, I took the localize:true property away and then it started working (I could run ng serve without said error) , then I added it again, and it continued working. Not sure what is happening there, hopefully you’ll be luckier than me here!
How to check what current LOCALE_ID is being used in the application
Sometimes you need to know what locale is being used in the application to do certain things (like look up database data specifically for that language etc). Best way to do that seems to do it like this in a component:
And by getting the LOCALE_ID this way, we can work with it like such.
I can see in my console that “ja” is being printed as the current language that is used for the application.
Where to manage translations and do them
For managing, adding translations, importing and exporting these language/translation file types you are working with in Angular I found that poeditor (poeditor.com) works pretty well. You can just upload your files there and share them with the people who will do the translations and then you download it and put into your Angular project. Although one bad thing, it seems it isn’t 100% free, but there is a trail at least! If you know a better program for translations let me know.
If you are interested on how to deploy a multi-language app to Google Cloud for an instance, take a look at the steps and information provided by Thierry Falvo.
Some people prefer to do the other way where you can translate the application directly in the app instead of having different builds (builds which contains different languages) of your app. The other method people talk about when wanting to translate “on the fly”/do “hot reload” is ngx-translate.


Latest Comments